🚀 프로덕션 환경 배포 준비하기 (1)
🧐 무엇을 하는가?
학생 때 만들었던 서비스들은 규모가 작아서, 개발 환경과 서비스 환경을 구분하지 않았다.
프로젝트를 진행하면 다양한 환경을 구축하고, 손쉽게 전환할 수 있어야 한다.
이 중에서도 가장 많이 다루는 설정은 바로 DB 선택과 설정!
이번에는 환경 별로 프로필을 만들고, 이를 다루는 법에 대해 알아보자. 🧑💻
🛠️ 프로필을 사용하여 설정 관리하기
하나의 어플리케이션에는 다양한 환경이 있어야한다.

Dev 환경, QA 환경, Prod 환경 등등 여러 개의 환경들이 존재한다면
같은 코드에서 다른 DB들과 통신하거나 다른 웹 서비스도 호출할 수 있다.
이것을 우리는 프로필이라고 한다
src/main/resources의 application.properties를 복사해보자.
그리고 각각 환경에 맞게 -dev, -prod를 추가해보자
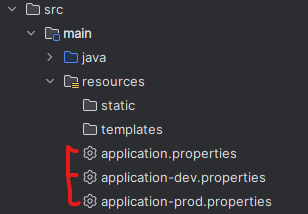
이렇게 하면 프로파일이 추가된다.
각 환경 별로 로그를 다르게 할 수 있도록 설정을 변경해보자
logging.level.org.springframework=trace
# 또는
logging.level.org.springframework=info
prod환경엔 info를, dev환경에 trace를 각각 입력해 저장해준 뒤
application.properties를 다음처럼 수정해준다.
spring.profiles.active=prod그리고 dev로도 변경해보면서 서버를 실행시켜보자!
다른 서버 로그가 기록될 것이다!
🧩 애플리케이션에 복잡한 설정 지정하기
이번엔 우리가 어떤 DB와 통신하고 있고, DB 여러 설정 값들을 지정한다고 가정해보자.
current-service.url, current-service.username, current-service.password
우리가 지정하려는 값은 위와 같다.
이때 우리가 여러가지 DB와 통신하려고 할 때마다 수정해주어야 한다.
📝 Configuration 프로퍼티
Configuration 프로퍼티를 만들어서 이용할 수 있다.
Configuration 클래스를 만들어보자
package com.in28minutes.springboot.learnspringboot;

import org.springframework.boot.context.properties.ConfigurationProperties;
import org.springframework.stereotype.Component;

@ConfigurationProperties(prefix = "current-service")
@Component
public class CurrentServiceConfiguration {

    private String url;
    private String username;
    private String password;

    public String getUrl() {
        return url;
    }

    public void setUrl(String url) {
        this.url = url;
    }

    public String getUsername() {
        return username;
    }

    public void setUsername(String username) {
        this.username = username;
    }

    public String getPassword() {
        return password;
    }

    public void setPassword(String password) {
        this.password = password;
    }
}
String url, username, password를 선언해주고 각 getter, setter를 선언했다
그런 다음 properties에 다음과 같이 작성하자
application.properties
#logging.level.org.springframework=debug
spring.profiles.active=prod

current-service.url=http://default.in28minutes.com
current-service.username=defaultusername
current-service.password=defaultkey
application-dev.properties
logging.level.org.springframework=trace

current-service.url=http://dev.in28minutes.com
current-service.username=dev-username
current-service.password=dev-key
spring.profiles.active를 dev와 prod로 변경해가며 확인해보자.
Tomcat 서버를 실행시켜 데이터를 조회해보자!
package com.in28minutes.springboot.learnspringboot;

import org.springframework.beans.factory.annotation.Autowired;
import org.springframework.web.bind.annotation.RequestMapping;
import org.springframework.web.bind.annotation.RestController;

import java.util.Arrays;
import java.util.List;

@RestController
public class CurrentConfigurationController {

    @Autowired
    private CurrentServiceConfiguration configuration;

    @RequestMapping("/current-configuration")
    public CurrentServiceConfiguration retrieveAllCourses() {
        return configuration;
    }
}
여기 경로로 접속해서 확인해 볼 수 있다.
'개발관련 > Spring(BE)' 카테고리의 다른 글
| Spring Boot 프로덕션 환경 배포 준비하기 (3) (2) | 2023.12.04 |
|---|---|
| Spring Boot 프로덕션 환경 배포 준비하기 (2) (0) | 2023.12.04 |
| Spring Boot 시작하기 - 목표 (0) | 2023.11.24 |
| Spring Boot - POJO, JavaBean, Spring Bean (0) | 2023.11.01 |
| Spring Boot - 강한 결합(Tight Coupling)과 느슨한 결합(Loose Coupling) (2) | 2023.11.01 |


